Are you a beginner looking to customize the design of your WordPress website? One of the first steps you’ll need to take is installing a WordPress theme. So if you are wondering how to install a WordPress theme you came to the right place.
Make sure that you have installed WordPress on your hosting before installing a WordPress theme.
In this guide, we will walk you through the process of installing a new theme and provide you with some tips along the way. Let’s get started!
Step 1: Choose a WordPress Theme
Before you can install a theme, you need to decide on the design that best suits your website. There are thousands of free and premium themes available in the WordPress theme directory and third-party marketplaces.
Take your time to explore different options and select the one that suits your website’s purpose and branding.
How to find WordPress themes (Free or Paid)
You can find WordPress themes in the official WordPress theme directory wordpress.org, which includes both free and premium options.
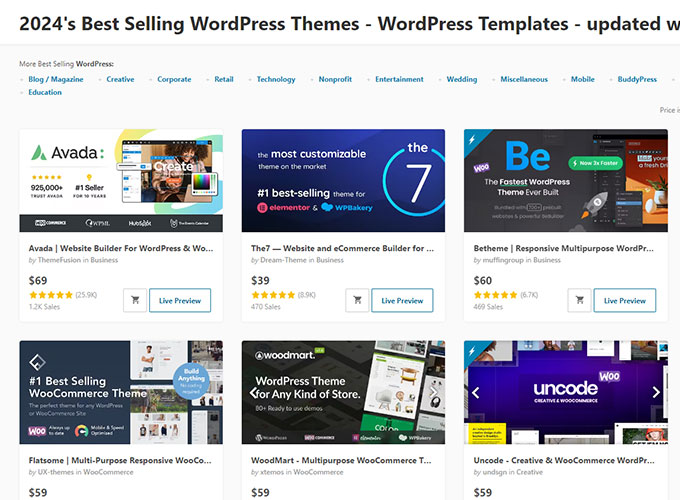
Alternatively, you can explore third-party marketplaces like ThemeForest or Creative Market to browse through an even greater selection of paid themes.
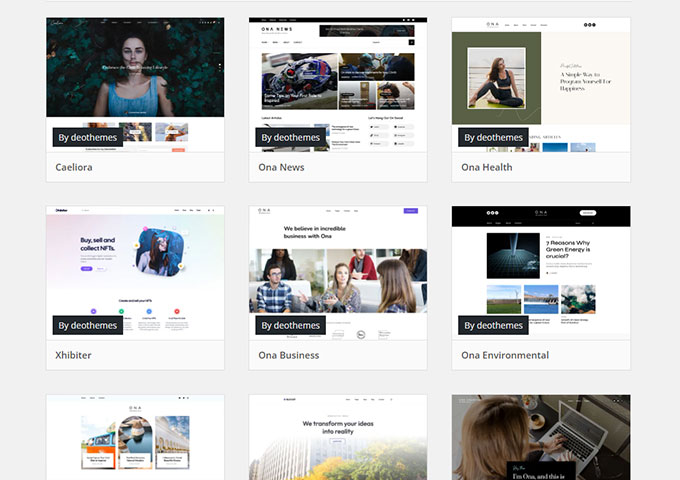
One of the advantages of using wordpress.org is the abundance of free WordPress themes available for users.
These themes, often developed by seasoned professionals, offer a range of design options, enabling both beginners and experienced website owners to create visually appealing and user-friendly websites without incurring any costs.
Confused about which WordPress theme to choose? Check out these guides, our WordPress experts picked the best themes for you to choose.
- Best Free Magazine WordPress themes
- Best WooCommerce themes
- Fastest WordPress themes
- Best Free WordPress themes for bloggers
- Best Free Minimalist WordPress themes
- Best WordPress block themes for Full Site Editing
- Best Construction Company WordPress themes
Free vs. Premium WordPress theme
When choosing a new theme for your WordPress site, it’s important to understand the key differences between free and premium themes. Free themes are a great choice for beginners or those with budget constraints.
They provide basic functionality and design options, allowing you to create a simple, yet effective website. However, they may lack advanced features and customization options that are often available in premium themes.
Premium WordPress themes, on the other hand, typically offer more sophisticated features and customization options. One of the most popular themes can be found on the theme marketplace like ThemeForest.
They may include built-in SEO tools, drag-and-drop page builders, a wider range of templates, customer support, and regular updates.
These features can enhance the overall design, functionality, and user experience of your website, potentially leading to higher engagement and conversion rates.
However, premium themes come at a cost, which may vary depending on the features offered. Therefore, it’s essential to evaluate your website’s needs and budget before deciding between a free or premium theme.
An eCommerce store or a business website, for instance, might benefit from the advanced features a premium theme offers, while a personal blog or a small non-profit organization might find a free WordPress theme sufficient for their needs.
In all cases, ensure the theme is responsive and compatible with your version of WordPress, and any plugins you plan to use. Also, consider the theme’s rating and reviews to gauge its performance and reliability.
Step 2: Download the WordPress Theme
If you’re using a free theme from the WordPress themes directory, you can install it directly from your WordPress dashboard.
Simply navigate to Appearance > Themes and click on the Add New button. Search for the theme by name or browse through the available options. Once you find the theme you want, click on the Install button.
If you’ve purchased a premium theme from a theme marketplace or a theme club, you will usually receive a ZIP file containing the theme files. Save this file to your computer, as you will need this for the next steps.
Step 3: Install the WordPress Theme
Once you have downloaded the theme file, the next step is to install it on your WordPress website. There are three methods you can use to install a theme:
Method 1: Install a WordPress theme via the theme directory
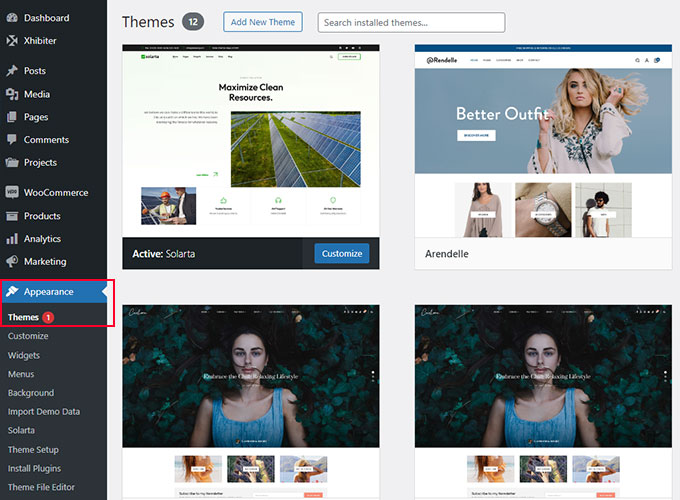
1. Log in to your WordPress admin, and go to Appearance > Themes.
In WordPress admin hover over the Appearance menu item and click on the Themes dropdown menu. From here, click on the Add New Theme button.
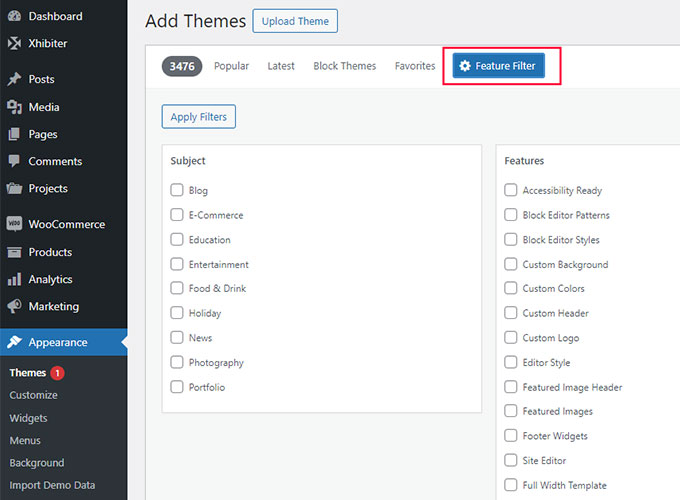
2. You can use the filter or type in the search bar to find WordPress themes
The filter provides you with options to filter by:
- Popular
- Latest
- Block Themes
- Favorite

By clicking the Feature filter you can refine your search even further. It includes sorting by Subject, Features, and Layout.
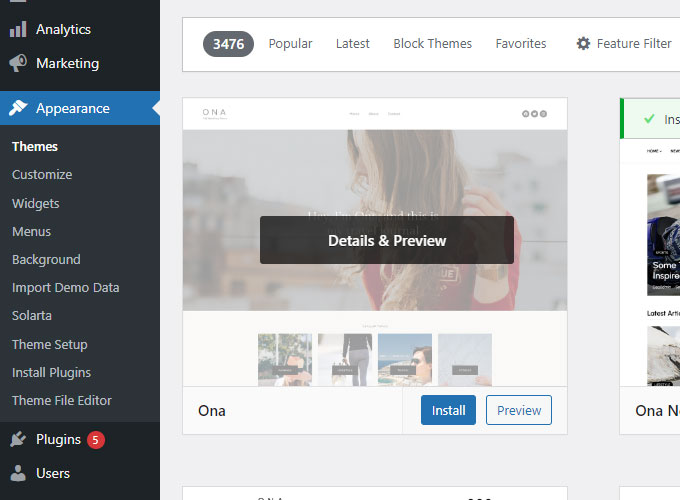
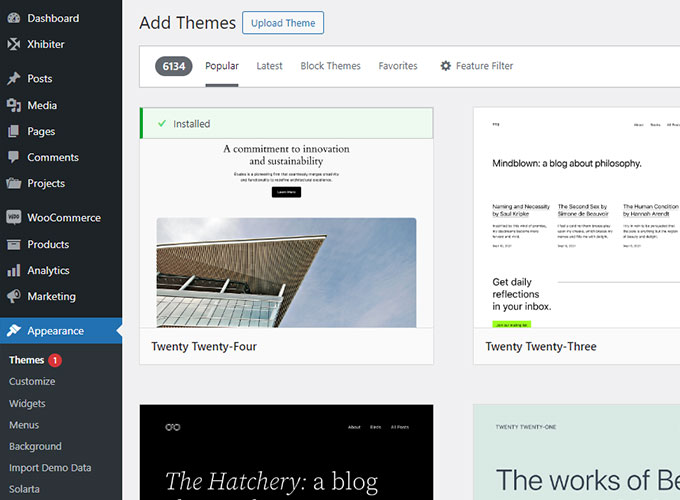
3. Select a theme and click Install.
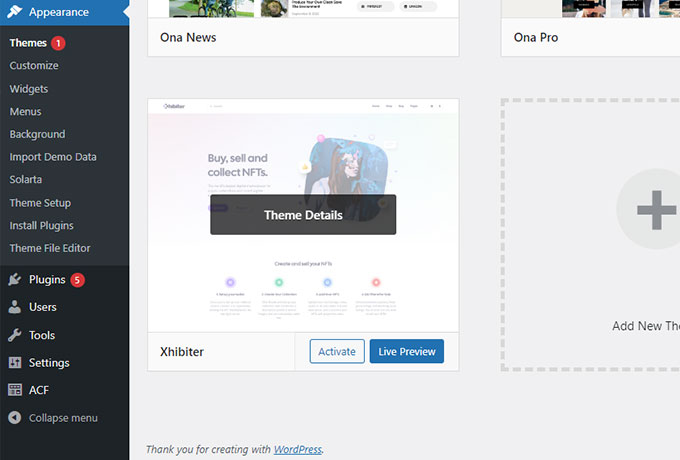
After browsing through the available options, once you’ve settled on a theme that aligns with your brand and website requirements, simply hover over it. You will see an Install button appear.
Clicking the Install button will download and install the theme onto your WordPress site.
This process may take a few moments, but rest assured, WordPress is doing all the heavy lifting behind the scenes to ensure your new theme is properly installed and ready to be activated. Once the theme has been installed click Activate.
Method 2: Install a WordPress theme from the WordPress Dashboard
While installing a WordPress theme via the dashboard might seem direct and user-friendly, there are significant reasons to consider manual installation through the upload button.
Manual installation allows you to upload themes that may not be available in the WordPress theme directory, providing an opportunity to use a wider variety of unique and specially designed themes.
This method is particularly beneficial when you’re using a premium theme that you’ve purchased from third-party developers.
1. In your WordPress dashboard, go to Appearance > Themes.
Navigate to the themes page by hovering over the Appearance menu item and then clicking the Themes link.
2. Click on the Add New Theme button.
Click on the Add New Theme button and you will be redirected to a new page showing the themes directory free themes.
3. Click on the Upload Theme button.
Click on the Upload Theme button to start the manual upload of your theme zip file.
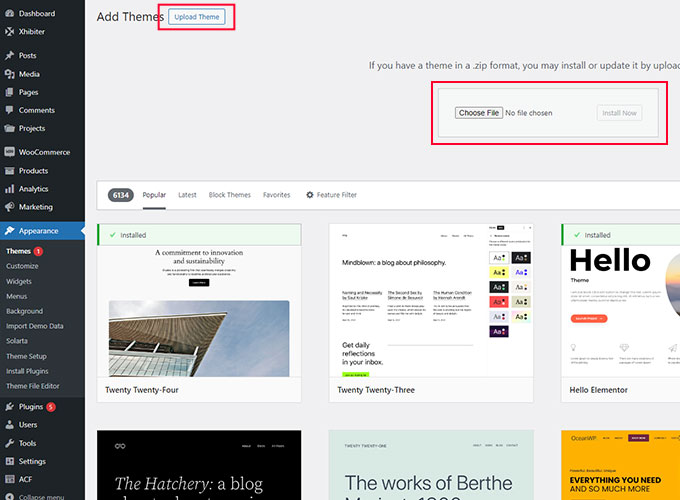
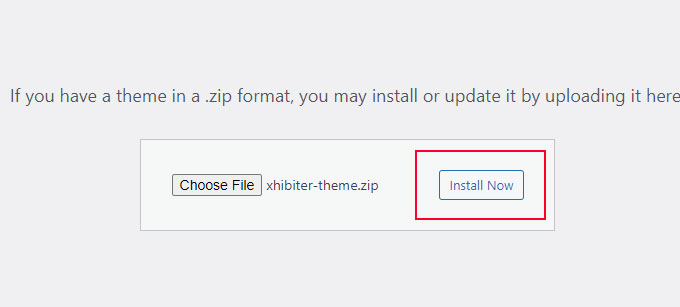
4. Choose the theme ZIP file from your computer and click on the Install Now button.
You can then click the Choose File button or simply drag and drop the zip file directly onto the Choose File button. Yes, it works too!

Click the Install button to start the installation process.
5. Once the theme is installed, click on the Activate button to make it live on your website.
WordPress will start the installation process and show the notification when it’s successfully completed. Click on the Activate link to enable the new theme on your website.

Method 3: Install a WordPress theme via FTP
1. Extract the theme ZIP file on your computer.
2. Connect to your website using an FTP client (e.g., FileZilla).
To connect to your website using an FTP client like FileZilla, first download and install the FTP client on your computer.
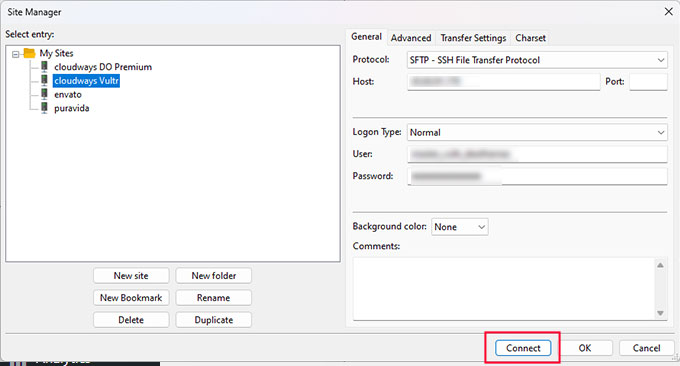
Once installed, open FileZilla, go to File > Site Manager (Ctrl + S), and click New Site. In the dialogue box that opens, fill in the Host field with your website’s FTP server address, which you can usually obtain from your web hosting provider.
Keep the Port field empty, unless your web host specifically provides one. Then, under the Logon Type dropdown menu, select Normal and input your FTP username and password, also provided by your web host.
Click Connect to establish the FTP connection. A successful connection will allow you to see your local files on the left and your website’s files on the right in FileZilla’s interface.
Always remember to exercise caution while accessing your website’s files to prevent any accidental modification or deletion of important files.
3. Navigate to the wp-content/themes/ directory on your server.
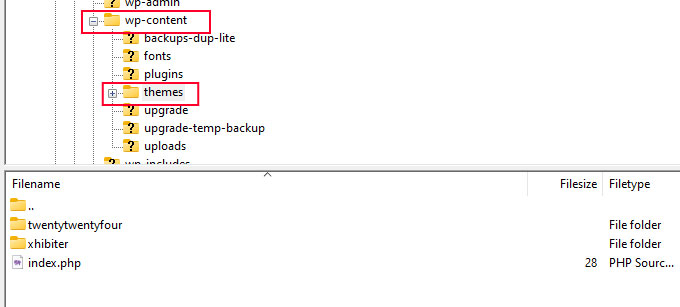
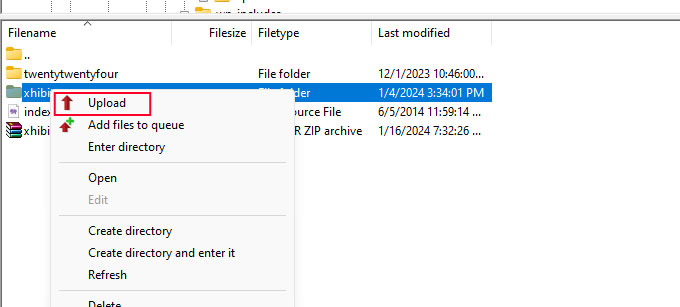
4. Upload the extracted theme folder to the themes directory.
5. In your WordPress dashboard, go to Appearance > Themes.
You should see the newly uploaded theme listed. Click on the Activate button to make it live on your website.
Step 4: Customize Your WordPress Theme
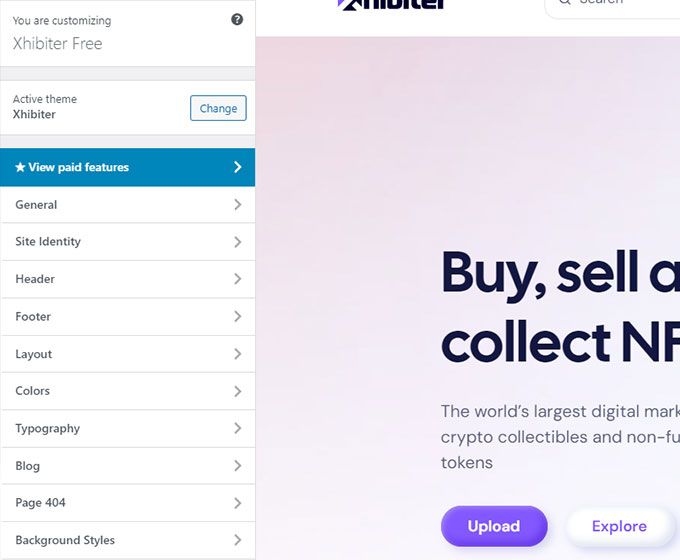
After successfully installing and activating your WordPress theme, you can start customizing it to match your preferences.
Navigate to Appearance > Customize in your WordPress dashboard to access the theme customization options.
Here, you can modify various aspects of your theme, such as colors, fonts, layouts, and more. You can add even more personality by connecting Adobe Fonts making your brand stand out.
Bonus tip: How to Change Your Current WordPress Theme
If you ever desire to refresh your site’s appearance or functionality, changing your current WordPress theme is a straightforward process.
Simply navigate to your WordPress admin dashboard and click on Appearance > Themes. You’ll see your active theme highlighted at the top of the page. To activate a new theme, find it in your theme library below, hover over it, and click Activate.
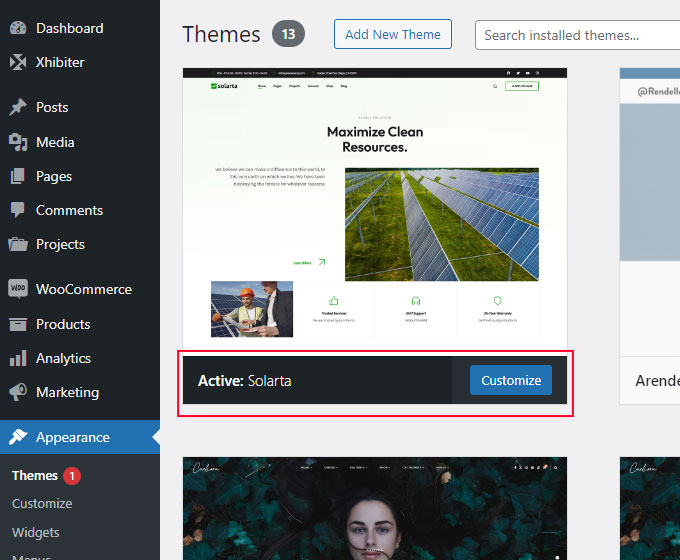
If the new theme you want isn’t in your library yet, click on Add New at the top of the page to search the WordPress theme directory or upload a theme from your local drive. After installing your new theme, remember to click Activate to make it live on your site.
It’s important to note that changing themes doesn’t erase your previous posts, pages, or content. However, you might have to reconfigure some theme-specific features, widgets, or menus to suit your new choice.
Always remember to backup your site before making major changes like a theme switch to avoid any loss of data.
Common Issues and Solutions
Sometimes, you may encounter issues during the theme installation process. Here are a few common problems and their solutions:
1. “The theme is missing the style.css stylesheet” error
This error usually occurs when you try to upload the entire ZIP file instead of the theme’s specific ZIP file. Often theme authors archive theme zip archive inside of another archive. Make sure you extract the theme zip archive from the ZIP file and upload that instead.
2. “Are you sure you want to do this?” error
If you encounter this error when uploading a theme, it is likely due to a low PHP configuration limit on your server. You can resolve this issue by increasing the PHP memory limit or uploading the theme via FTP.
3. Theme compatibility issues
Sometimes, a theme may not work well with certain plugins or WordPress versions. Before installing a theme, make sure to check its compatibility with the latest version of WordPress and any plugins you plan to use. Also, make sure to make a full backup before installing themes or plugins.
FAQ about How to install WordPress themes
How do I manually install a WP theme?
To manually install a WordPress theme, first make sure that you have an installable zip archive. Navigate to \u003cstrong\u003eAppearance -\u003e Themes\u003c/strong\u003e and click on the \u003cstrong\u003eAdd New\u003c/strong\u003e button, this will open a new page where you can click \u003cstrong\u003eUpload Theme\u003c/strong\u003e button.\u003cbr\u003e\u003cbr\u003eClick on the \u003cstrong\u003eChoose File\u003c/strong\u003e button and upload your theme zip archive file. Once the theme is uploaded click on the \u003cstrong\u003eactivate\u003c/strong\u003e link to activate your new theme.
Why there is no add new theme in WordPress?
If you don’t see the \u003cstrong\u003eAdd New\u003c/strong\u003e theme button you most likely using WordPress.com. WordPress.com restricts its cheaper plan users from uploading any themes or plugins.\u003cbr\u003e\u003cbr\u003eSo, you have a few options, to upgrade to a higher Business plan or to switch to a self-hosted option like Bluehost. To understand the difference between \u003ca href=\u0022https://deothemes.com/wordpress-com-vs-wordpress-org/\u0022 data-type=\u0022post\u0022 data-id=\u002217027\u0022\u003eWordPress.com and WordPress.org\u003c/a\u003e we wrote a comprehensive post.
How do I install a WordPress theme like demo?
Many themes come with pre-defined demos available for import. To install a WordPress theme like a demo you usually need to import demo content. \u003ca href=\u0022https://wordpress.org/plugins/one-click-demo-import/\u0022 target=\u0022_blank\u0022 rel=\u0022noreferrer noopener nofollow\u0022\u003eOne click demo import\u003c/a\u003e is a popular WordPress plugin that can import content if the theme
How do I find out what WordPress theme a site is using?
You can find out the WordPress theme of a website by using a theme detector tool like \u003ca href=\u0022https://deothemes.com/wordpress-theme-detector/\u0022 target=\u0022_blank\u0022 rel=\u0022noreferrer noopener\u0022\u003eWordPress Theme Detector\u003c/a\u003e, What WordPress Theme Is That, WPThemeDetector, or Scan WP.
Conclusion
By following the steps outlined in this guide, you should now be able to successfully install WordPress themes and customize them to your liking.
Remember to choose a theme that complements your website’s purpose and brand, and don’t hesitate to reach out to theme developers or the WordPress community if you encounter any issues. Happy theming!
If you enjoyed this article check our other guides: