To add Adobe Fonts to Elementor, go to Elementor > Settings > Integrations, enter your Adobe Fonts Project ID, and click Save. The fonts will then appear in the typography dropdown inside the Elementor editor. If you do not have Elementor Pro, you can use the free Custom Adobe Fonts plugin instead.
In this guide, we cover three methods for adding Adobe Fonts to your WordPress site: using Elementor Pro, using a free plugin, and adding them manually with code. We also cover Google Fonts, font optimization, and troubleshooting tips.
| Method | Requires | Difficulty | Best For |
|---|---|---|---|
| Elementor Pro Integration | Elementor Pro license | Easy | Elementor Pro users |
| Custom Adobe Fonts Plugin | Free plugin | Easy | Any WordPress site |
| Manual Code (WPCode) | Free plugin + CSS | Intermediate | Full control |
How Adobe Fonts Works
Adobe Fonts, formerly known as Typekit, is a subscription-based font library that offers thousands of high-quality fonts from top designers and foundries.
With a subscription, you can access the entire library and use it on your website without any additional licensing fees.
Some benefits of using Adobe Fonts include:
- Huge library of over 20,000 fonts. Wide selection of high-quality fonts: Adobe Fonts offers a large library of professionally designed fonts from well-known type foundries such as Frere-Jones Type, Type Network, and Monotype.
- No worries about updates. As part of the Adobe Creative Cloud suite, Adobe Fonts is regularly updated and synced to your website.
- Easy licensing. Unlike other font providers, Adobe Fonts offers a single licensing model that covers both desktop and web use. This means you don’t have to worry about purchasing separate licenses for each type of usage.
- Cost-effective. Adobe Fonts is included in the Adobe Creative Cloud subscription, making it cost-effective for those who are already using other Adobe products. Additionally, the fonts are licensed for both personal and commercial use at no additional cost.
- Customization options. With Adobe Fonts, you have the ability to customize your chosen fonts by adjusting weight, width, slant, and other settings. This allows for even more flexibility in creating a unique and cohesive design for your website.
Step 1: Create an Adobe Fonts Account
To get started, head to the Adobe Fonts website and create an account. If you already have a Creative Cloud subscription, you can use your existing login credentials.

Step 2: Browse and Select Fonts
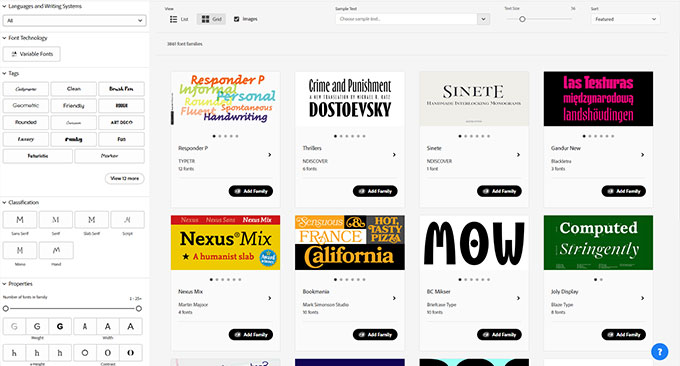
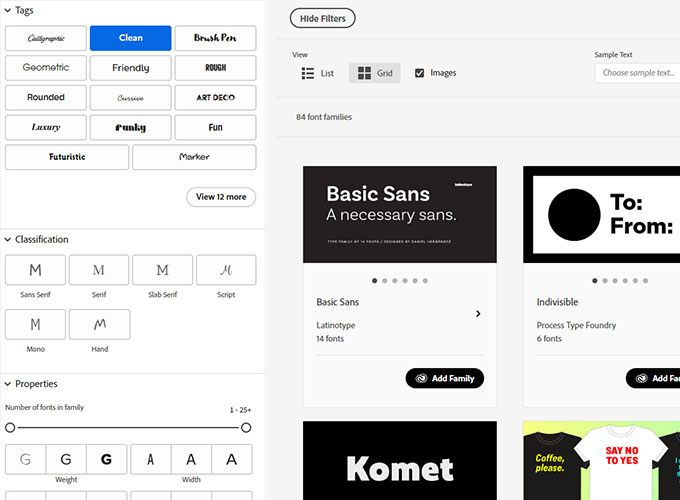
Once you have created an account, start browsing through the vast collection of fonts available on Adobe Fonts. You can explore different categories, such as serif, sans-serif, script, and more to find the perfect font for your website’s design. Use filters to your advantage to help you refine your search.
Step 3: Adding the Fonts to a Web Project
After selecting the fonts you want to use, click on the Add to Web Project button. This will add the fonts to your active font list, which can be accessed from your Adobe Fonts account. Copy and save your Project ID for later usage.

How to add Adobe Fonts to Elementor
To add Adobe fonts to Elementor, first, ensure that the desired font is added to your Adobe Fonts web project.
To easily add Adobe Fonts to Elementor you can also use WordPress themes from DeoThemes. By installing an additional plugin bundled in the premium version you get access to Adobe Fonts and Custom Fonts integration out of the box.
Next, we will explore multiple options for adding Adobe Fonts to Elementor.
Adding Adobe Fonts using Elementor Pro
Here is the quick video tutorial on how to add Adobe Fonts to Elementor. If you prefer step-by-step instructions, then keep reading.
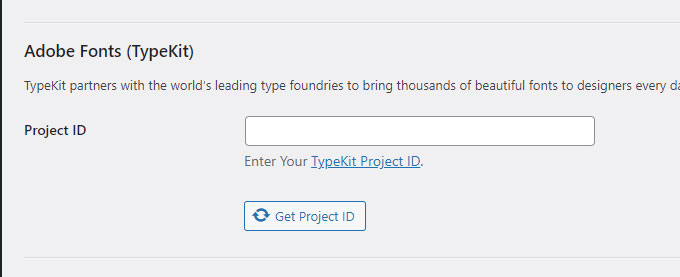
If you have an active Elementor Pro subscription you can easily add Adobe Font to your website. In your WP admin navigate to Elementor -> Settings -> Integrations and look for an Adobe Fonts (Typekit) form. Enter your Project ID which you copied earlier. Click Get Project ID.
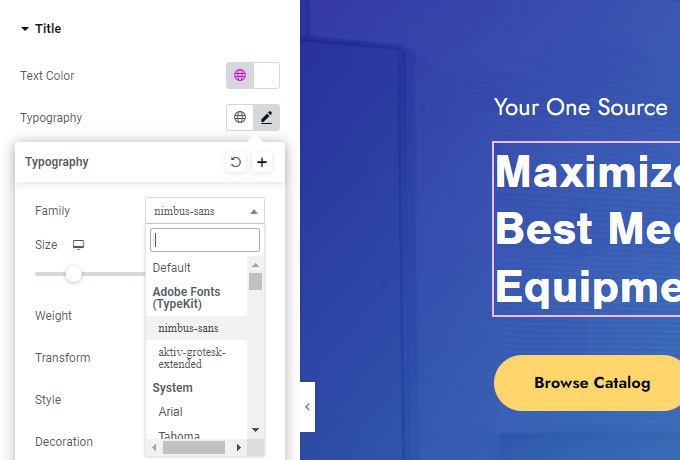
Then, open Elementor and go to the page where you want to use the font. In the Elementor Editor, navigate to the typography settings and choose the Typekit font from the Adobe Fonts dropdown menu.
Next, we will explore another way of adding Adobe Fonts to your WordPress website using free plugins.
How to add Adobe Fonts in WordPress with plugins
Adding custom fonts to your WordPress site can be done through various methods. One popular and easy way is by using a plugin such as Custom Adobe Fonts (formerly known as Typekit).
Adding Adobe Fonts Using the Custom Adobe Fonts Plugin
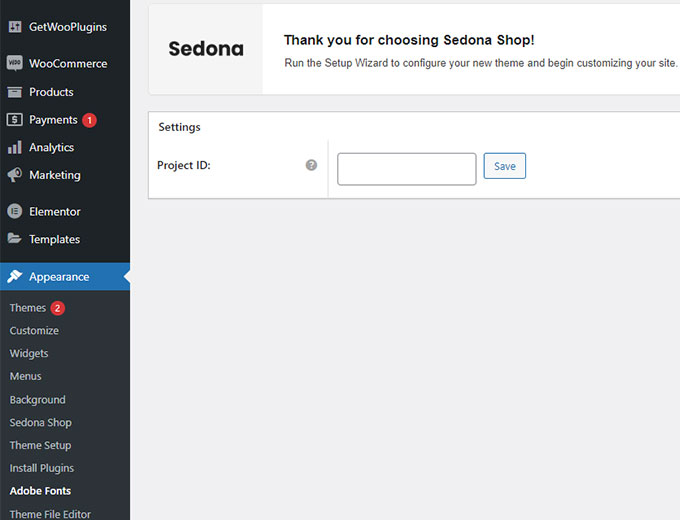
After you have installed and activated the Custom Adobe Fonts plugin navigate to Appearance -> Adobe Fonts.
Enter your Project ID which can be found in your Adobe Fonts account.
Add Adobe Fonts (Typekit) to WordPress Manually
If you prefer to manually add Adobe Fonts (formerly known as Typekit) to your WordPress website, follow these steps:
- Log in to your Adobe Fonts account and create a new project.
- Add the desired fonts to your project.
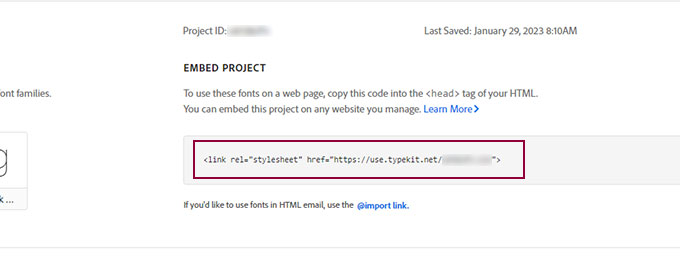
- Open your Web Projects, and look for an Embed Project title.
- Copy the link by clicking an icon or selecting the link.
- Install the WPCode – Insert Headers and Footers + Custom Code Snippets plugin.
- Navigate to Code Snippets > Header & Footer and paste the code snippet in the Header field.
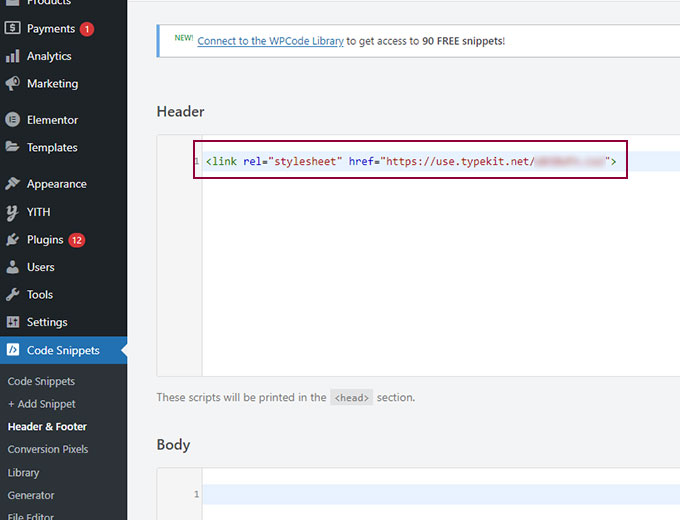
- Save your changes.
- Navigate to Appearance > Customize in your WordPress dashboard.
- Under Additional CSS, add the following code:
body { font-family: 'font-name', sans-serif !important; }- Replace “font-name” with the name of the font you want to use.
- Save your changes.
- Preview your website to see the new font in action.

Why You Should Add Custom Fonts on Your WordPress Website
Using Adobe Fonts on your website not only adds a unique touch to your design but also has several benefits:
- Stand out from other websites using default fonts
- Enhance the visual appeal of your website
- Improve user experience by choosing legible and easy-to-read fonts
- Increase brand recognition with consistent use of custom fonts throughout your website.
By following these steps and adding custom fonts to your WordPress website, you can easily create a more visually appealing experience for your users.
So why wait? Start exploring the vast collection of fonts available on Adobe Fonts today and take your website design to the next level!
Where to Find Custom Fonts to Use in WordPress
- Google fonts – Google fonts offer a wide variety of free and open-source web fonts that can be easily integrated into your WordPress website. These fonts are optimized for the web and are constantly updated, making them a reliable choice for custom fonts.
- Adobe Fonts (Formely Typekit) – Adobe Fonts offers a wide selection of high-quality fonts from renowned type foundries such as Frere-Jones Type, Emigre, and more. These fonts can be easily integrated into your WordPress website through the Custom Adobe Fonts plugin or by manually adding the code to your site.
- Font Squirrel – Font Squirrel offers a large collection of hand-picked, high-quality fonts that are free for commercial use. They also offer a webfont generator tool that allows you to convert any font into a web-friendly format.
- Fonts.com – Fonts.com offers both free and premium fonts for commercial use. They have a wide selection of professionally designed fonts that can be easily integrated into your WordPress website using the provided code snippet.
- Fontpair – Fontpair is a helpful resource for choosing font pairings that work well together. They offer a curated collection of Google font combinations and allow you to test them out before implementing them on your website.
How to select fonts in the WordPress Customizer
The WordPress Customizer allows you to easily select and customize fonts for your website. In this example, we will be using the popular WordPress theme, Ona. Follow these steps to change the font settings using the Customizer:
- Log in to your WordPress dashboard.
- Go to Appearance > Customize.
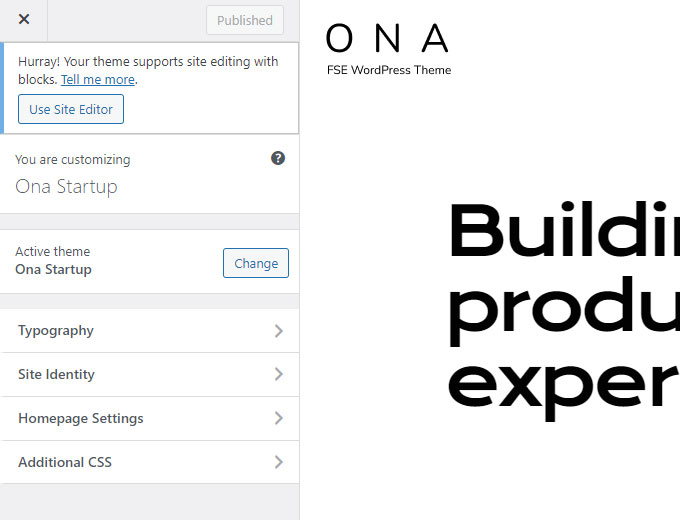
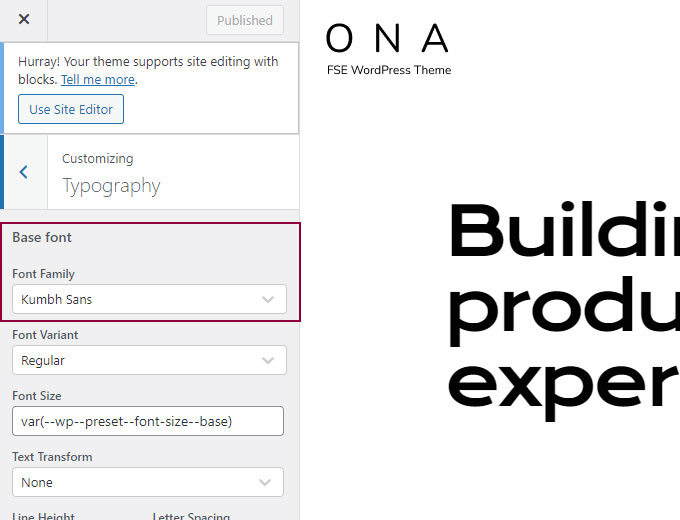
- In the Customizer panel, click on Typography.
- Select the desired typography options such as font family, size, weight
How to Manually Add Google Fonts to WordPress (no plugin required)
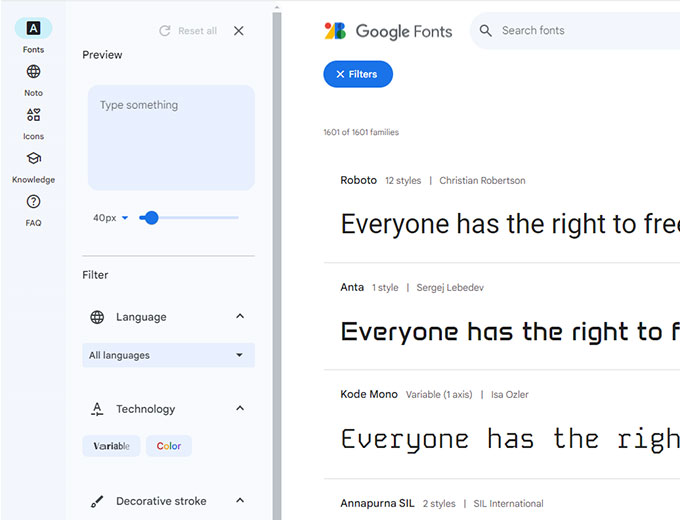
Step 1. Select a Google Font
Navigate to the Google Fonts website, which is a library hosting over 1,500 free licensed font families.
Here, you can explore various fonts, and preview them to find one that suits your website’s aesthetic.
To narrow down your options, use the filters for category (serif, sans-serif, display, handwriting, monospace), language, font style, and other properties.
Once you find a font you like, click on it and you’ll be directed to a new page with more details about the font, including different weights and styles available.
This page will also show examples of what the font looks like in use. Make sure to select a font that aligns with your brand identity and enhances the readability of your content.
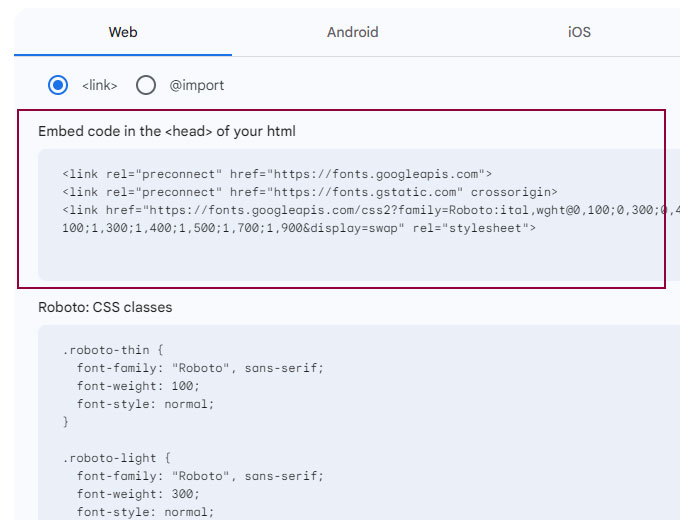
Step 2. Embed a Google Font Code on Your Website
On the font detail page, click on the Get Font button which will open a new page containing the embed code. Click the Get embed code button, and copy the standard <link> code from the Embed code in the <head> of your html section. This code is necessary to connect your WordPress website to the Google Fonts servers and load your chosen font file.
Step 2.1. Add the Embed Code to Your Website’s Header
Once you have the embed code, navigate to your WordPress dashboard and follow these steps:
- Install the WPCode – Insert Headers and Footers + Custom Code Snippets plugin.
- Navigate to Code Snippets > Header & Footer and paste the code snippet in the Header field.
- Save your changes.
This action instructs your website to load the selected Google Font from Google’s servers. In the next part, we will apply this font to specific elements of your website.
Step 3. Apply the New Font Using CSS
After successfully embedding the Google Font to your website, you can apply this font to different elements of your website using CSS. Here’s how you can do it:
- Navigate to Appearance > Customize in your WordPress dashboard.
- Under Additional CSS, add the following code:
body { font-family: 'font-name', sans-serif !important; }- Replace “font-name” with the name of the font you want to use.
- Save your changes.
- Preview your website to see the new font in action.
Remember to check your website to ensure the font displays as expected. Also, be mindful of readability and how the font looks on different devices to provide a consistent user experience.
Bonus: How to Optimize Google Fonts in WordPress Using the OMGF Plugin
If you are using Google Fonts for your WordPress website, you can easily do so using the OMGF (Oh My Fonts!) plugin. Follow these steps to add Google Fonts:
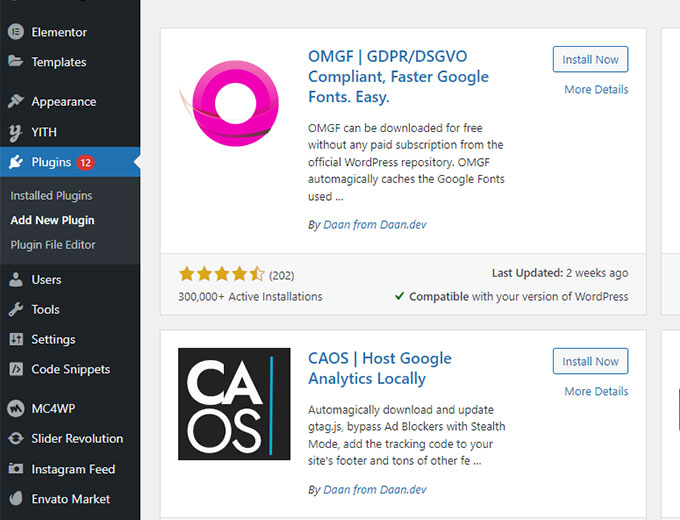
- Install and activate the OMGF plugin. Go to Plugins -> Add New and simply type omgf in the search form.
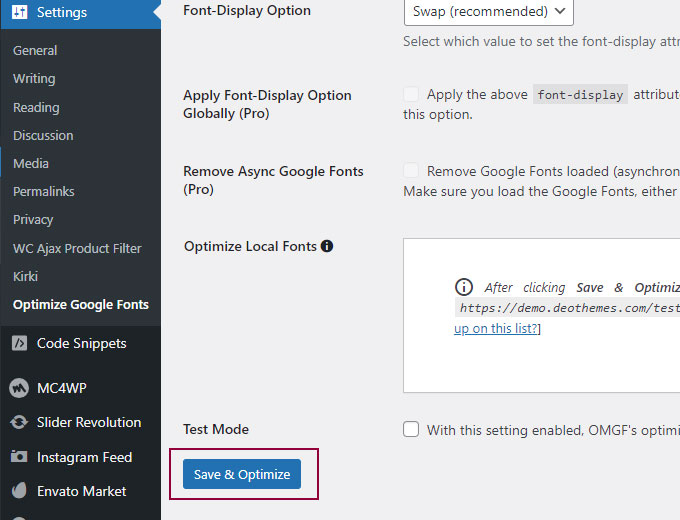
- Go to Settings > Optimize Google Fonts in your WordPress dashboard. Scroll down and click the Save & Optimize button.
- Your Google Fonts should be detected and cached. You can then select which font-weight to load early or don’t load at all. This can improve your website performance.
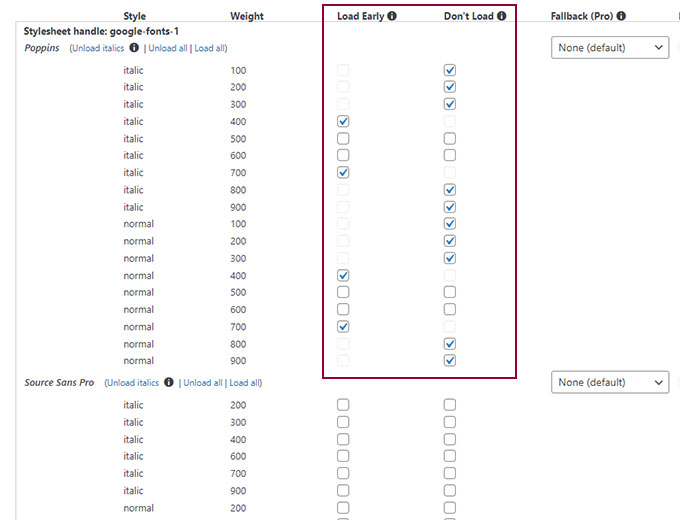
- Click on Save & Optimize to optimize fonts on your website.
Troubleshooting Tips
1. Fonts Not Showing Up
If the fonts you’ve selected are not appearing on your website, follow these troubleshooting steps:
- Clear your browser cache and refresh the page.
- Double-check that you’ve entered the correct Adobe Fonts Project ID in the Custom Adobe Fonts plugin settings.
- Ensure that you have properly applied the fonts to the desired elements or sections using the Elementor editor.
2. Slow-Loading Fonts
If you notice that your website’s performance is affected by slow-loading fonts, consider the following solutions:
- Optimize your website’s overall performance by minifying CSS and JavaScript files.
- Use a caching plugin to improve page load times.
- Consider using locally hosted font files for faster loading speeds.
3. Compatibility Issues with Themes or Plugins
In some cases, certain themes or plugins may conflict with the Custom Adobe Fonts plugin or the fonts themselves. If you encounter compatibility issues, try the following:
- Disable other plugins temporarily to identify any conflicts.
- Reach out to the plugin or theme developer for assistance or check their documentation for compatibility recommendations.
By following these steps and troubleshooting tips, you can successfully add Adobe Fonts to your Elementor-powered website, enhancing its typography and overall visual appeal. Enjoy the creative possibilities that custom fonts bring to your design!
Conclusion
In conclusion, we discussed the different methods of adding Adobe Fonts to a WordPress site using Elementor.
Whether you have access to Elementor Pro, prefer to use a free Custom Adobe Fonts plugin, or want to manually add fonts using custom snippets and CSS, there are options available to suit your needs.
By following the steps outlined in this post, you can enhance the typography of your website and create a more visually appealing experience for your audience.
FAQ How to Add Adobe Fonts to Elementor
How do I add Adobe Fonts to my WordPress site?
There are three ways to add Adobe Fonts to WordPress: 1. Using the built-in integration in Elementor Pro (Settings > Integrations > Adobe Fonts). 2. Using the free Custom Adobe Fonts plugin. 3. Manually embedding the font stylesheet via WPCode and applying it with CSS. All three methods require an Adobe Fonts Project ID from your Adobe account.
How do I add custom fonts to Elementor free?
To add Adobe Fonts to Elementor for free, install the Custom Adobe Fonts plugin from the WordPress plugin repository. After activation, go to Appearance > Adobe Fonts, enter your Project ID from your Adobe Fonts account, and save. The fonts will then appear in the typography dropdown in the Elementor editor alongside Google Fonts.
How do I import Adobe Fonts into Elementor?
In Elementor Pro, navigate to Elementor > Settings > Integrations and enter your Adobe Fonts Web Project ID. Click Save Changes. Then open the Elementor editor, select any text widget, and your Adobe Fonts will appear in the font family dropdown. If you do not have Elementor Pro, use the free Custom Adobe Fonts plugin instead.
Can you import fonts into Elementor?
Yes. Elementor Pro has a Custom Fonts feature at Elementor > Custom Fonts where you can upload .woff, .woff2, .ttf, or .otf font files directly. For Adobe Fonts specifically, use the Integrations tab in Elementor settings and enter your Project ID. For the free version of Elementor, use the Custom Adobe Fonts plugin.
Is Adobe Fonts free to use?
Adobe Fonts is included with any Adobe Creative Cloud subscription, including the Photography plan ($9.99/month). There are no additional licensing fees for web use. If you do not have a Creative Cloud subscription, you cannot access Adobe Fonts. For free alternatives, consider Google Fonts, which offers over 1,500 free font families.
Do Adobe Fonts slow down my website?
Adobe Fonts are loaded from Adobe’s CDN, which adds an external request to your page load. This can slightly increase load time compared to locally hosted fonts. To minimize the impact, only activate the font weights and styles you actually use in your Web Project, and consider adding font-display: swap to your CSS to prevent invisible text while fonts load.
What is the difference between Adobe Fonts and Google Fonts?
Adobe Fonts requires a Creative Cloud subscription and offers over 20,000 premium fonts from professional foundries. Google Fonts is completely free and offers over 1,500 open-source fonts. Both can be used on WordPress sites. Adobe Fonts are loaded from Adobe’s servers, while Google Fonts can be self-hosted for better performance and GDPR compliance.
How do I use custom fonts on my website?
To use custom fonts on your website, you have several options. You can use a font service like Adobe Fonts or Google Fonts with a plugin. You can also upload font files (.woff2, .ttf, .otf) directly using Elementor Pro’s Custom Fonts feature or a plugin like Custom Fonts. For manual installation, add the font files to your server, use the @font-face CSS rule to register them, and apply them with the font-family property in your stylesheet.
If you enjoyed this article check our other guides: