WordPress powers over 43% of all websites on the internet, and for good reason. It is the most flexible, cost-effective, and beginner-friendly platform available for building professional websites. For digital agencies, WordPress offers everything you need to showcase your work, attract clients, and grow your business online.
In this step-by-step guide, you will learn exactly how to build a digital agency website with WordPress from scratch. We will cover everything from choosing a domain name and hosting to designing your portfolio, optimizing for SEO, and setting up lead generation. Whether you are launching a new agency or rebuilding your existing site, this tutorial will walk you through the entire process.
The best part? You do not need any coding skills. With the right theme and a visual page builder like Elementor, you can create a stunning, high-converting agency website entirely through drag-and-drop. By the end of this guide, you will have a fully functional website that positions your agency as a leader in your industry.
What You Need Before Starting
Before you start building your digital agency website, you need to gather a few essential tools and resources. Having everything ready upfront will save you time and help you avoid common pitfalls during the setup process.
Domain Name
Your domain name is your agency’s address on the web. Choose something short, memorable, and easy to spell. Ideally, it should include your agency name or a keyword related to your services. Stick with a .com extension if possible, as it is the most recognized and trusted. If your preferred .com is taken, consider alternatives like .agency, .studio, or .co. You can register a domain through providers like Namecheap, Google Domains, or Cloudflare Registrar for around $10-15 per year.
Web Hosting
Your web hosting provider stores your website files and makes them accessible to visitors. For a digital agency, we recommend managed WordPress hosting because it handles server maintenance, security updates, and backups automatically. Top options include Cloudways, Kinsta, and SiteGround. Expect to pay between $5 and $30 per month depending on the plan. Managed hosting ensures your site loads fast and stays secure, which is critical when potential clients are evaluating your agency.
A Professional WordPress Theme
Your theme determines the overall look and functionality of your site. Choose a theme designed specifically for agencies, with portfolio layouts, team member sections, and fast loading times. We will cover theme selection in detail in the next section.
Essential Plugins
You will also need a handful of plugins to extend your site’s functionality. Here is a quick list of what to have ready:
- Page Builder: Elementor (for drag-and-drop design)
- Contact Form: WPForms or Contact Form 7
- SEO Plugin: RankMath (for on-page optimization)
- Caching Plugin: WP Super Cache or W3 Total Cache
- Security Plugin: Wordfence or Sucuri
- Backup Plugin: All-in-One WP Migration
With these essentials in place, you are ready to start building. Let’s dive into the step-by-step process.
Step 1: Install WordPress and Your Theme
The first step in building your digital agency website is installing WordPress and selecting a professional theme. This foundation determines how your site looks, functions, and performs.
Installing WordPress
Most modern hosting providers offer a one-click WordPress installation process. After signing up for your hosting plan, log into your hosting dashboard and look for the WordPress installer. On Cloudways, it is part of the server setup process. On SiteGround and Bluehost, you will find it in the control panel under “WordPress Tools” or “Auto Installers.” The entire installation takes less than five minutes. Once installed, you can log into your WordPress dashboard by navigating to yourdomain.com/wp-admin.
Choosing and Installing Your Theme
To install a theme, go to Appearance > Themes > Add New in your WordPress dashboard. For free themes, you can search the WordPress theme directory directly. For premium themes, click “Upload Theme” and select the .zip file you downloaded after purchase.
For a digital agency website, we highly recommend Dorya as your primary theme choice. Dorya was built from the ground up specifically for digital agencies and creative studios, and it comes packed with features that make building a professional agency site effortless:
- 100+ custom Elementor widgets designed for agency use cases
- Full dark mode with per-element color customization, perfect for modern agency branding
- Portfolio layouts including grid, masonry, and slider options
- 4 case study templates to showcase your client work with impact
- Adobe Fonts integration for premium typography
- One-click demo import so you can start with a polished, pre-built design
- Fast loading performance optimized for Core Web Vitals
You can preview the theme in action on the Dorya live demo to see how it looks before purchasing.
If you prefer free alternatives, themes like Astra, OceanWP, and Hello Elementor are solid starting points. However, free themes typically lack the agency-specific features like portfolio layouts, case study templates, and team sections that premium themes offer out of the box. For a detailed comparison, check out our guide on the best WordPress themes for digital agencies in 2026.
Step 2: Import Demo Content and Configure Settings
Once your theme is installed and activated, the next step is to import the demo content and configure your core WordPress settings. This gives you a fully designed starting point that you can customize with your own branding and content.
One-Click Demo Import
Most premium WordPress themes include a demo import feature that replicates the theme’s demo site on your own installation. With Dorya, you will find the demo import option under Appearance > Demo Import or within the theme’s settings panel. Simply click the “Import” button, and the theme will automatically set up all the demo pages, images, widgets, and customizer settings. This process usually takes 2-5 minutes depending on your server speed.
Demo import is incredibly valuable because it gives you a professional-looking site immediately. Instead of building every page from scratch, you simply replace the demo content with your own text, images, and branding.
Configure Essential WordPress Settings
After importing the demo, take a few minutes to configure your WordPress settings properly:
- Site Title and Tagline: Go to Settings > General and enter your agency name and a brief tagline that describes what you do.
- Permalinks: Navigate to Settings > Permalinks and select “Post name.” This creates clean, SEO-friendly URLs like yourdomain.com/services/ instead of yourdomain.com/?p=123.
- Reading Settings: Go to Settings > Reading and set your homepage to display a static page (your homepage) rather than your latest posts.
- Timezone: Set your timezone under Settings > General so scheduled posts and forms display the correct time.
Set Up Navigation Menus
Your navigation menu is one of the most important elements of your site. Go to Appearance > Menus to create and organize your menu. A typical agency navigation includes: Home, About, Services, Portfolio, Blog, and Contact. Keep it simple and limit your top-level menu items to 5-7 links. Too many menu items can overwhelm visitors and reduce conversions.
If your theme supports mega menus, you can use dropdown menus to organize sub-pages under main categories. For example, under “Services,” you might list Web Design, Branding, SEO, and Digital Marketing as sub-items.
Step 3: Create Your Essential Pages
Every digital agency website needs a core set of pages that work together to attract visitors, build trust, and convert them into clients. Let’s walk through each essential page and what it should include.
Homepage
Your homepage is the first impression most visitors will have of your agency. It needs to communicate who you are, what you do, and why someone should work with you, all within the first few seconds of landing on the page.
Start with a hero section that features a compelling headline, a brief supporting statement, and a clear call-to-action button. For example, your headline might be “We Build Digital Experiences That Drive Growth” with a CTA button that says “View Our Work” or “Get a Free Quote.”
Below the hero, include a services overview section highlighting 3-4 of your key services with icons and short descriptions. This gives visitors an immediate understanding of what you offer. Follow this with a featured portfolio section showcasing 3-6 of your best projects. Use high-quality images and link each one to its full case study page.
Add a social proof section that includes client logos, awards, or statistics like “200+ projects completed” or “50+ happy clients.” Social proof dramatically increases trust and encourages visitors to take the next step. Finally, close the page with a final CTA section that invites visitors to contact you or request a consultation.
About Us Page
The About Us page is one of the most visited pages on any agency website. Clients want to know who they will be working with before they commit to a project.
Include a team member section with professional photos and short bios for each team member. Mention their role, expertise, and a personal detail that makes them relatable. If you are a solo agency, feature yourself along with any freelancers or partners you collaborate with regularly.
Tell your company story in a way that resonates with your target audience. Why did you start this agency? What problem are you solving? What sets you apart from competitors? Include your core values and mission statement to show what drives your work.
Adding client logos or partner badges to this page also strengthens credibility. If you have worked with recognizable brands, display their logos prominently.
Services Page
Your services page should clearly outline what your agency offers and help visitors understand the value of each service. Avoid vague descriptions. Instead, be specific about what clients receive when they hire you.
For each service, include a detailed description explaining what it involves, a list of deliverables the client can expect, and an overview of your process from kickoff to delivery. If you offer web design services, for example, you might describe your process as: Discovery Call, Strategy & Planning, Wireframing, Design, Development, Testing, and Launch.
Consider creating individual pages for each service if you offer more than four. This helps with SEO by allowing you to target specific keywords like “WordPress web design services” or “agency branding packages.” Link each service to related case studies so visitors can see real examples of your work.
Portfolio and Case Studies Page
Your portfolio is arguably the most important page on your agency website. Potential clients want to see proof that you can deliver results before they hire you.
Use a grid or masonry layout for maximum visual impact. Dorya offers both options plus a slider layout, making it easy to choose the presentation style that best fits your work. Each portfolio item should open to a full case study page that includes:
- Client name and industry
- The challenge the client was facing
- Your solution and the approach you took
- Results and metrics (e.g., “150% increase in organic traffic”)
- Client testimonial
- High-quality screenshots or mockups of the finished work
Use high-quality images throughout your portfolio. Blurry or low-resolution screenshots will hurt your credibility. Where possible, link to live sites so visitors can experience your work firsthand.
Contact Page
Make it as easy as possible for potential clients to reach you. Your contact page should include:
- A contact form built with WPForms or Contact Form 7. Keep the fields minimal: name, email, phone (optional), project type, and message.
- A Google Maps embed showing your office location (if you have a physical office).
- Multiple contact methods including email address, phone number, and physical address.
- Business hours so visitors know when to expect a response.
Avoid asking for too much information upfront. Long forms with many required fields discourage submissions. You can always gather more details during the initial call.
Blog Page
A blog is essential for both SEO and demonstrating your expertise. When potential clients see that you regularly publish valuable content about your industry, it builds trust and positions you as a thought leader.
Plan to publish at least 2-4 blog posts per month. Focus on topics that your target audience is searching for, such as “how to choose a digital agency,” “web design trends for 2026,” or “how much does a website redesign cost.” Each blog post is an opportunity to rank in search engines and attract visitors who may become clients.
Step 4: Design and Customize Your Brand
Consistent branding across your entire website is what separates amateur agency sites from professional ones. Every visual element should reinforce your brand identity and create a cohesive experience for visitors.
Setting Brand Colors
Limit your palette to 2-3 primary colors plus a neutral color for text and backgrounds. Your primary brand color should be used for buttons, links, and key accents. A secondary color can add visual variety without creating clutter. Use your theme’s Global Colors or Customizer settings to define these colors once and apply them consistently across every page.
If you are unsure about color choices, tools like Coolors.co and Adobe Color can help you generate harmonious palettes. Choose colors that evoke the emotions you want associated with your brand. Blue conveys trust and professionalism, while bold colors like orange or red create energy and urgency.
Typography
Typography plays a major role in how your website feels. A common approach is pairing a serif font for headings with a sans-serif font for body text. This combination creates visual hierarchy and is easy to read. Alternatively, you can use a single sans-serif font family with different weights for headings and body text.
With Dorya’s Adobe Fonts integration, you have access to thousands of premium typefaces that go beyond what Google Fonts offers. This gives your agency site a distinctive, polished look that stands out from competitors using the same free fonts.
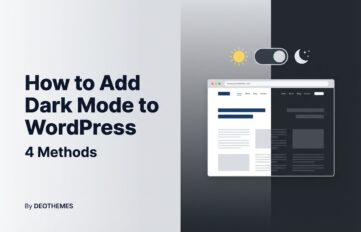
Logo and Dark Mode
Upload your logo through the WordPress Customizer under Appearance > Customize > Site Identity. Make sure your logo is sized appropriately for the header. A logo that is too large or too small disrupts the visual balance of your navigation bar. Upload both a standard and retina version for crisp display on high-resolution screens.
Dark mode has become increasingly popular for agency websites because it creates a modern, sleek aesthetic that makes portfolio images pop. Dorya offers full dark mode with per-element color customization, meaning you can control exactly how every element looks in dark mode rather than relying on an automatic color inversion that may produce inconsistent results. If dark mode aligns with your brand, it can differentiate your site and create a memorable impression on visitors.
Regardless of your color scheme and typography choices, the key is maintaining visual consistency across all pages. Every page should feel like it belongs to the same website. Consistent spacing, alignment, color usage, and font sizing create a professional experience that builds trust.
Step 5: Set Up Your Portfolio
Your portfolio is the single most important element of your digital agency website. It is where potential clients decide whether your agency is the right fit for their project. A strong portfolio can generate leads on its own, while a weak one can drive visitors away regardless of how great the rest of your site looks.
Choosing the Right Layout
The layout you choose for your portfolio depends on the type of work you showcase. Grid layouts work well when you want a clean, organized presentation with uniform sizing. Masonry layouts are ideal for agencies with varied project types, as they accommodate different image aspect ratios and create a more dynamic, Pinterest-style display. Slider layouts are best when you want to feature a small number of hero projects with maximum visual impact.
With Dorya, you get all three layout options plus 4 dedicated case study templates, giving you complete flexibility in how you present your work.
What to Include in Each Case Study
Each portfolio project should tell a compelling story. Structure your case studies with these key elements:
- Project Overview: A brief summary of the project, including the client name, industry, and scope of work.
- The Challenge: What problem was the client facing? Why did they need your help? This context makes your solution more impressive.
- Your Approach and Solution: Explain your process, the tools and strategies you used, and why you made the decisions you did.
- Results with Metrics: Quantify the impact wherever possible. “Increased organic traffic by 200% in 6 months” is far more compelling than “improved their website.”
- Client Testimonial: A quote from the client adds authenticity and social proof. Even a short testimonial like “Working with [Agency] transformed our online presence” adds credibility.
Quality Over Quantity
A common mistake is filling your portfolio with every project you have ever completed. Resist this temptation. 5-8 strong, well-documented projects will always outperform 20 mediocre ones. Choose projects that represent the type of work you want to attract more of. If you want to work with SaaS companies, showcase your best SaaS projects. If e-commerce is your focus, feature your top online store builds.
Finally, commit to updating your portfolio regularly. Add new projects as you complete them and retire older work that no longer represents your current capabilities. A portfolio filled with outdated designs sends the wrong message about your agency’s skills.
Step 6: Optimize for SEO
Search engine optimization is how potential clients find your agency when they search for services like yours online. Without SEO, your beautiful new website may never reach the people who need it most. Here is how to set up a solid SEO foundation for your agency website.
Install and Configure RankMath
We recommend RankMath as your SEO plugin. It is powerful, beginner-friendly, and offers many premium features for free. After installing and activating RankMath, run the setup wizard to configure your basic SEO settings. For a comprehensive look at SEO plugin options, read our guide on the best SEO plugins for WordPress in 2026.
Set up title templates for your pages and posts so every piece of content has a well-formatted, keyword-rich title tag. Write unique meta descriptions for every page on your site. Meta descriptions do not directly affect rankings, but they influence click-through rates from search results.
Technical SEO Essentials
Add schema markup for your organization using RankMath’s built-in schema generator. Include Organization schema on your homepage and LocalBusiness schema if you serve a specific geographic area. This helps search engines understand your business and can result in rich snippets in search results.
Create an XML sitemap (RankMath generates one automatically) and submit it to Google Search Console. This helps Google discover and index all your pages faster. Setting up Google Search Console also gives you valuable data about which search queries are bringing visitors to your site.
Keyword Strategy
For local agencies, target “[your city] + [service]” keyword combinations. Terms like “web design agency New York” or “digital marketing agency Austin” are highly valuable because they attract clients who are ready to hire. Create dedicated landing pages for each city-service combination you want to target.
Build internal links between your services and case studies. When you mention web design on your services page, link to a relevant web design case study. This helps search engines understand the relationship between your content and distributes authority across your site.
Use your blog content strategy to target long-tail keywords that your ideal clients are searching for. Topics like “how much does a website cost for a small business” or “WordPress vs custom web development” attract visitors who may need your services. Each blog post is an opportunity to rank for new keywords and drive organic traffic to your site.
Step 7: Optimize for Speed
Website speed is a critical ranking factor and directly impacts user experience. Research shows that if your site takes more than 3 seconds to load, you could lose up to 40% of your visitors. For an agency, a slow website sends the message that you do not prioritize quality, which is the opposite of what you want potential clients to think.
Set Up Caching
Install a caching plugin like WP Super Cache or W3 Total Cache. Caching stores static versions of your pages so they load instantly for returning visitors instead of being generated from scratch on every visit. If your hosting provider offers built-in caching (as most managed WordPress hosts do), you can use that instead of a plugin to avoid conflicts.
Optimize Images
Images are usually the largest files on any website and the biggest cause of slow loading times. Convert your images to WebP format, which offers superior compression without visible quality loss. Use a plugin like ShortPixel or Imagify to automatically convert and compress images on upload. Enable lazy loading so images below the fold only load when the visitor scrolls to them.
Additional Speed Optimizations
Minify CSS and JavaScript files to reduce their file size. Most caching plugins include this feature, or you can use a dedicated plugin like Autoptimize. Set up a CDN (Content Delivery Network) like Cloudflare to serve your content from servers closest to your visitors, reducing latency worldwide.
Your goal should be a Google PageSpeed Insights score of 90 or higher on desktop. Dorya achieves a PageSpeed score of 94 out of the box, giving you a strong speed foundation before any additional optimization. For a deep dive into WordPress speed optimization techniques, check out our complete guide on how to speed up a WordPress website.
Step 8: Set Up Lead Generation
A beautiful website means nothing if it does not generate leads for your agency. Every element of your site should be designed to guide visitors toward taking action, whether that is filling out a contact form, booking a call, or downloading a resource.
Place Contact Forms Strategically
Do not limit your contact form to just the Contact page. Add abbreviated contact forms to your homepage, services pages, and even at the bottom of case studies. The easier you make it for visitors to reach out, the more inquiries you will receive. Use a form plugin like WPForms to create different form variations for different pages.
Sticky Header with CTA
Use a sticky header that stays visible as visitors scroll. Include a prominent CTA button in your header, such as “Get a Quote” or “Start a Project.” This ensures there is always a conversion opportunity visible, no matter where the visitor is on the page.
Lead Magnets and AI Chatbot
Consider adding a pop-up or slide-in opt-in form that offers a free resource in exchange for an email address. Effective lead magnets for agencies include a free website audit, a downloadable checklist (like “10 Signs Your Website Needs a Redesign”), or a free consultation offer.
Integrating an AI chatbot can also boost conversions by allowing visitors to ask questions and get instant answers, even outside business hours. Many visitors prefer chat over filling out a form, especially when they have a quick question before committing.
PurioChat Chatbot for WordPress is an AI-powered chatbot plugin from PureThemes. Unlike generic chat widgets that require a human agent to be online, PurioChat uses artificial intelligence to answer visitor questions automatically based on your site content. It learns from your pages, posts, and product descriptions, so it can respond accurately without manual setup for every possible question.
For digital agencies, this is especially useful because potential clients often visit your site outside business hours. Instead of leaving with unanswered questions, they get instant responses about your services, pricing, and process. The plugin also captures contact details during conversations, so you can follow up with interested leads later.
Key features include full WooCommerce integration for agencies that run online stores, customizable chat appearance to match your branding, and lightweight code that does not impact page speed. It keeps all data on your WordPress server, which is important for agencies that handle sensitive client information and need to stay GDPR compliant.
Clear CTAs on Every Page
Every page on your website should have at least one clear call-to-action. On your services page, it might be “Request a Proposal.” On your portfolio page, it could be “Have a Similar Project? Let’s Talk.” On your blog posts, link back to your services or include a CTA to schedule a consultation.
For reference, a conversion rate of 2-5% is considered good for agency websites. If you are getting 1,000 visitors per month and converting at 3%, that is 30 potential leads per month. Track your conversions using Google Analytics 4 to understand what is working and what needs improvement.
Pre-Launch Checklist
Before you announce your new agency website to the world, run through this comprehensive checklist to make sure everything is polished and functional. Missing even one of these items could create a poor first impression or cause you to lose leads.
- All pages proofread and checked for typos, broken links, and placeholder content
- All contact forms tested by submitting test entries and confirming email delivery
- Mobile responsiveness verified on multiple devices (phone, tablet, laptop)
- SSL certificate active and HTTPS working on all pages (check for mixed content warnings)
- Google Analytics 4 installed and tracking page views correctly
- Google Search Console configured and verified for your domain
- XML sitemap submitted to Google Search Console
- Favicon uploaded and visible in browser tabs
- Social media links working and opening in new tabs
- 404 error page customized with helpful navigation and a link back to the homepage
- Privacy policy and terms of service pages created and linked in the footer
- Backup system configured and first full backup completed
- Loading speed tested on Google PageSpeed Insights (aim for 90+ on desktop)
- Cross-browser testing completed in Chrome, Firefox, Safari, and Edge
Take the time to go through every single item on this list. It is much better to delay your launch by a day or two than to go live with a broken contact form or missing SSL certificate. First impressions matter, especially for agencies whose entire business depends on demonstrating attention to detail.
How Much Does It Cost to Build a Digital Agency Website?
One of the biggest advantages of WordPress is its affordability. You can build a professional agency website for a fraction of what a custom-coded site would cost. Here is a breakdown of typical costs:
| Item | Free Option | Premium Option |
|---|---|---|
| Domain Name | N/A | $10-15/year |
| Web Hosting | N/A | $5-30/month |
| WordPress | Free | Free |
| Theme | Free (Astra, OceanWP) | $49-79 (Dorya) |
| Page Builder | Gutenberg (Free) | Elementor Pro ($59/year) |
| SEO Plugin | RankMath Free | RankMath Pro ($59/year) |
| Contact Form | WPForms Lite (Free) | WPForms Pro ($49.50/year) |
| Total Year 1 | ~$60 | ~$250-450 |
As you can see, you can get started for as little as $60 per year using free themes and plugins. The premium route costs between $250 and $450 for the first year, which is remarkably affordable considering what you get in return. Most agencies recoup this investment with a single client project.
The real cost savings come from the time you save. A premium theme like Dorya includes pre-built templates, custom widgets, and a polished design that would take hundreds of hours to build from scratch. When you factor in a developer’s hourly rate, a $49-79 theme saves you thousands of dollars compared to custom development.
The ongoing costs are also manageable. After the first year, your annual expenses drop because most themes include lifetime updates with a one-time purchase. Your recurring costs will primarily be hosting and any premium plugin renewals you choose to keep.
Bonus Tips for a Standout Agency Website
Beyond the essential steps above, here are some additional tips that can help your agency website stand out from the competition and convert more visitors into clients.
Use Video Content
Video is one of the most engaging content formats on the web. Consider adding a short agency intro video to your homepage that introduces your team and explains what you do. You can also add video testimonials from satisfied clients, which are more persuasive than text testimonials alone. Keep videos under 2 minutes for the best engagement, and host them on YouTube or Vimeo rather than uploading them directly to WordPress to avoid slowing down your site.
Add Process and Timeline Visuals
Clients want to know what working with you looks like before they sign a contract. Create visual process timelines that show the steps involved in a typical project, from initial consultation to final delivery. This reduces uncertainty and makes potential clients more comfortable reaching out. Many Elementor widgets, including those in Dorya, offer timeline and process step elements that make this easy to build.
Include Pricing Guidance
While many agencies avoid publishing pricing, including even a starting range can help qualify leads and save time. You do not need to list exact prices, but giving visitors a general idea (e.g., “Website projects starting from $3,000”) filters out clients who cannot afford your services and attracts those who can. This results in higher-quality inquiries and less time spent on discovery calls that go nowhere.
Leverage Social Proof Throughout
Do not limit testimonials and client logos to a single section of your homepage. Sprinkle social proof across your entire website. Add relevant testimonials to service pages, include client logos in sidebar widgets, and display review ratings where appropriate. The more proof visitors encounter that others trust you, the more likely they are to take action.
Frequently Asked Questions
Final Thoughts
Building a digital agency website with WordPress is one of the best investments you can make in your business. With the right theme, plugins, and a structured approach, you can create a professional online presence that attracts clients, showcases your expertise, and generates leads around the clock.
Let’s recap the key steps:
- Install WordPress and a professional theme like Dorya that is built for agencies.
- Import demo content and configure your core WordPress settings.
- Create your essential pages: Homepage, About, Services, Portfolio, Contact, and Blog.
- Customize your brand with consistent colors, typography, and visual identity.
- Build a compelling portfolio with detailed case studies and measurable results.
- Optimize for SEO using RankMath, schema markup, and a targeted keyword strategy.
- Optimize for speed with caching, image compression, and a CDN.
- Set up lead generation with strategic CTAs, contact forms, and conversion tools.
The agencies that succeed online are not always the ones with the biggest budgets or the flashiest designs. They are the ones that understand their audience, communicate their value clearly, and make it easy for potential clients to take the next step. WordPress gives you all the tools you need to do exactly that.
Ready to get started? Choose your theme, follow the steps in this guide, and launch your agency website with confidence. If you want a head start with a theme specifically designed for digital agencies, check out Dorya and import a full demo site in minutes. For more agency theme options, browse our curated list of the best WordPress themes for digital agencies in 2026.
Prefer the WordPress block editor over Elementor? See our guide to the best WordPress block themes for building agency sites with Full Site Editing.